

A great leader and a strong hook don’t mean much if the knot connecting them fails. Tying on hooks, swivels, and lures correctly is one of those fundamentals that separates anglers who lose fish at the worst moment from anglers who don’t think twice about their connections. Here’s how to tie each one properly.
Tying On a Hook: The Improved Clinch Knot
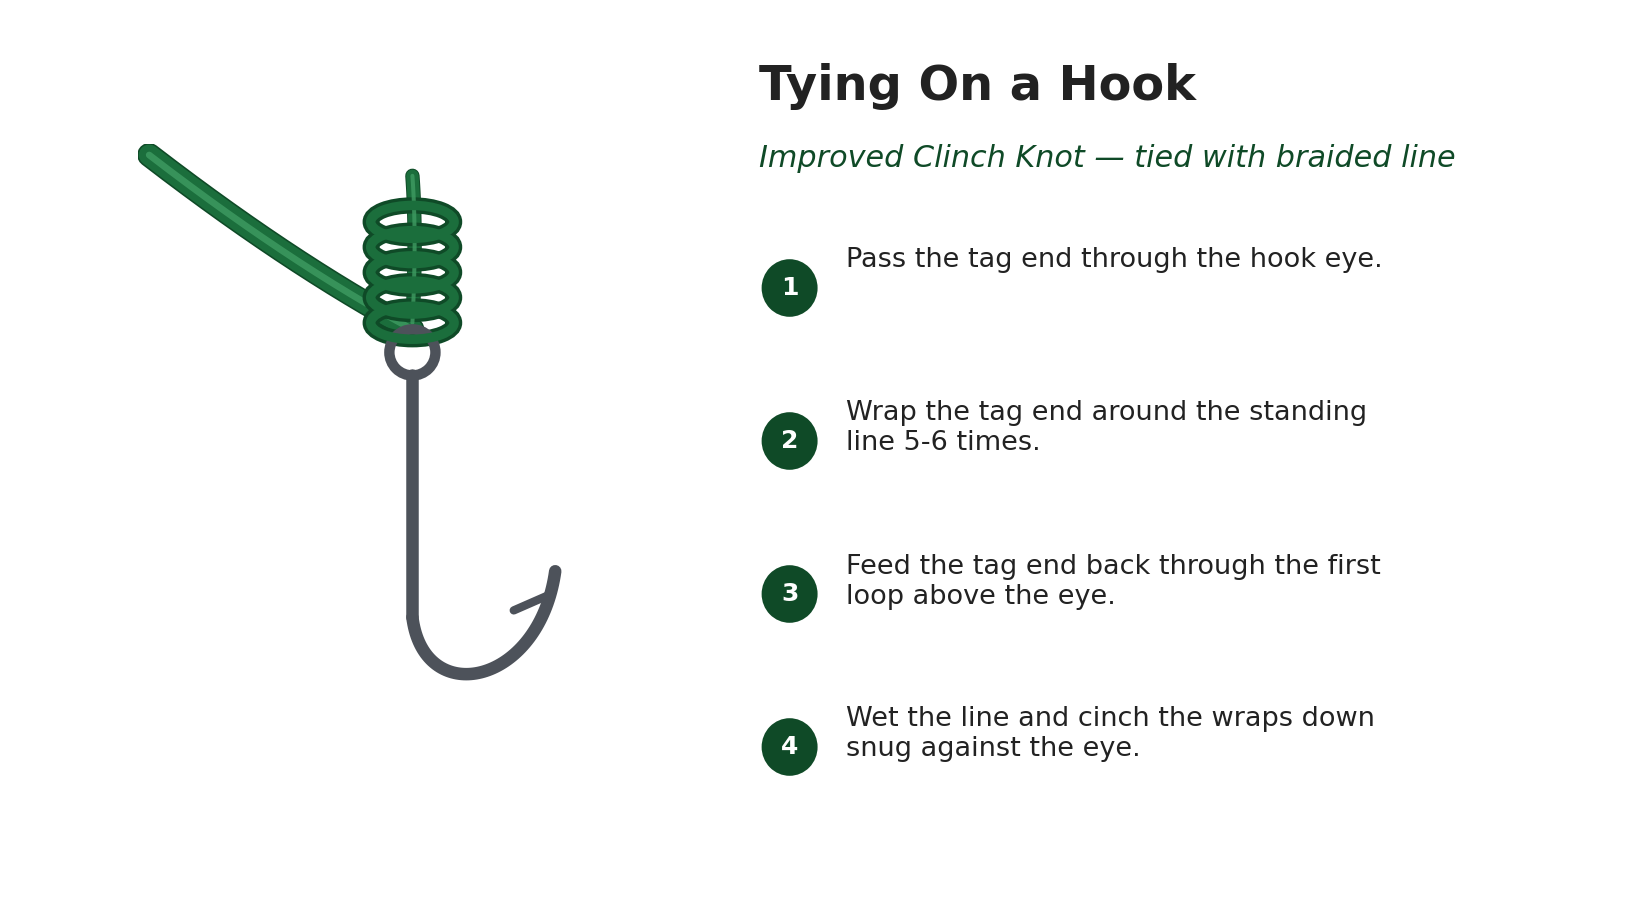
The improved clinch knot is the standard for attaching a hook directly to your leader — reliable, strong, and quick to tie once you’ve practiced it a few times.
- Thread the line through the hook eye, then wrap it around the standing line 5–7 times.
- Bring the tag end back through the small loop formed just above the eye.
- Pass the tag end through the larger loop you just created.
- Wet the knot with saliva or water, then pull it tight slowly and steadily.
- Trim the tag end close, leaving a small stub so it doesn’t slip.
For heavier hooks or bigger game like GT and tuna, the Palomar knot is an even stronger alternative — double the line through the eye, tie an overhand knot around the doubled line, pass the hook through the resulting loop, then wet and cinch it down.
Tying On a Swivel
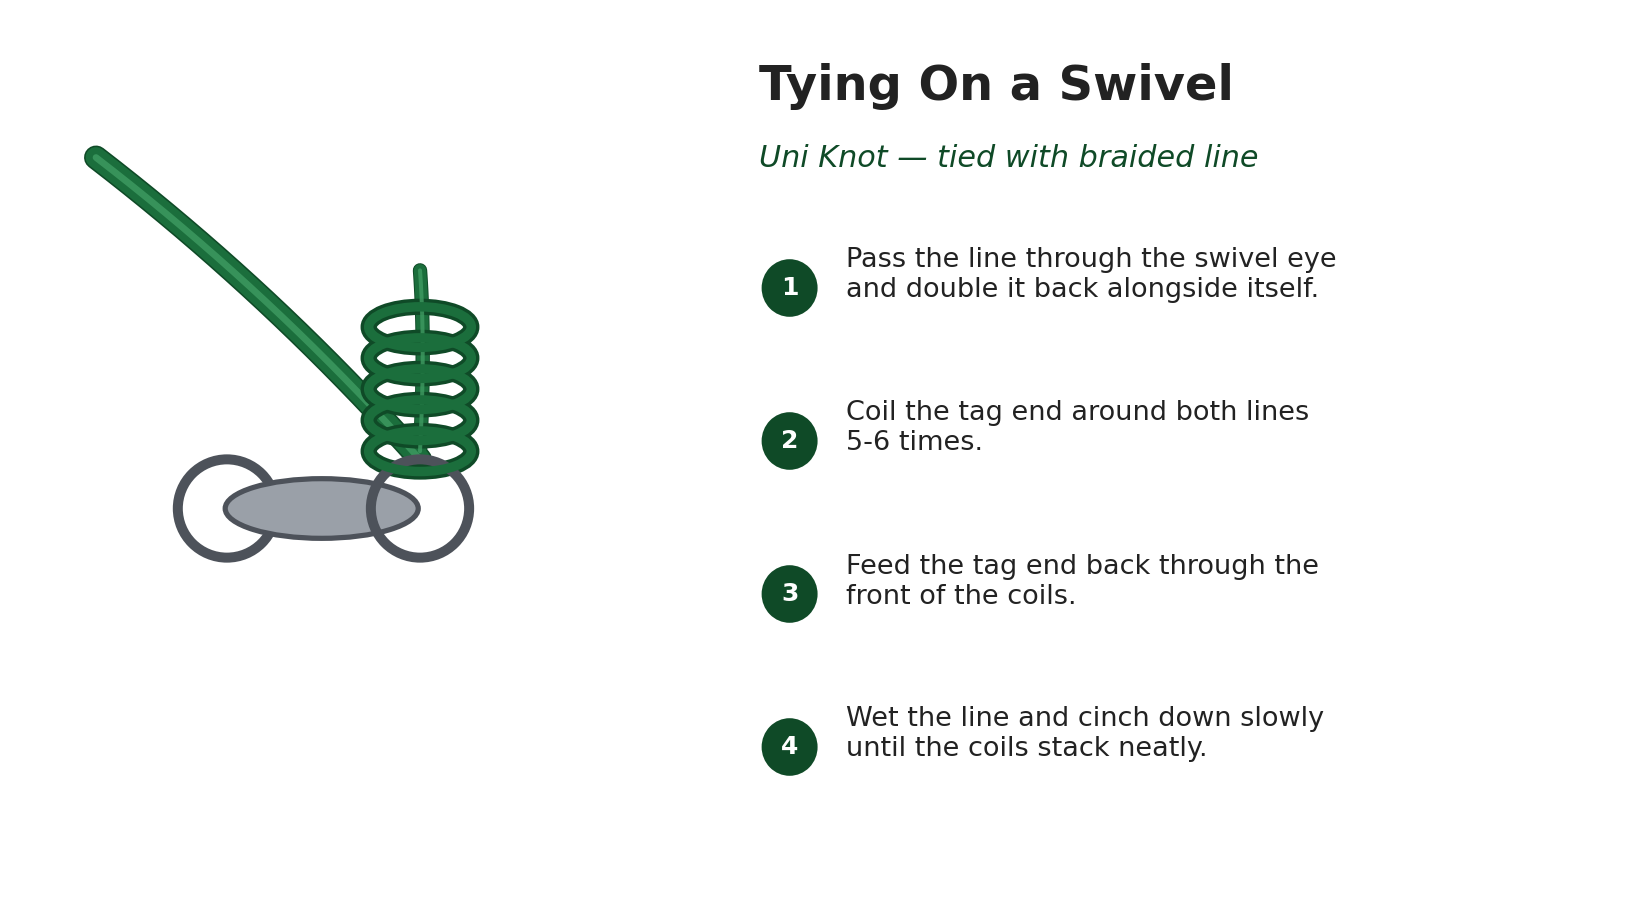
Swivels stop your line from twisting during retrieval, which matters most with lures that spin or when trolling. The same improved clinch or Palomar knot works fine for barrel swivels, but the key is making sure the eye of the swivel isn’t obstructed — a swivel packed with knot material won’t rotate freely, defeating the whole purpose of using one.
If you’re using a snap swivel to make lure changes faster, tie your knot to the swivel ring exactly the same way, then simply clip lures on and off through the snap without retying every time you switch it up.
Tying On a Lure: The Loop Knot
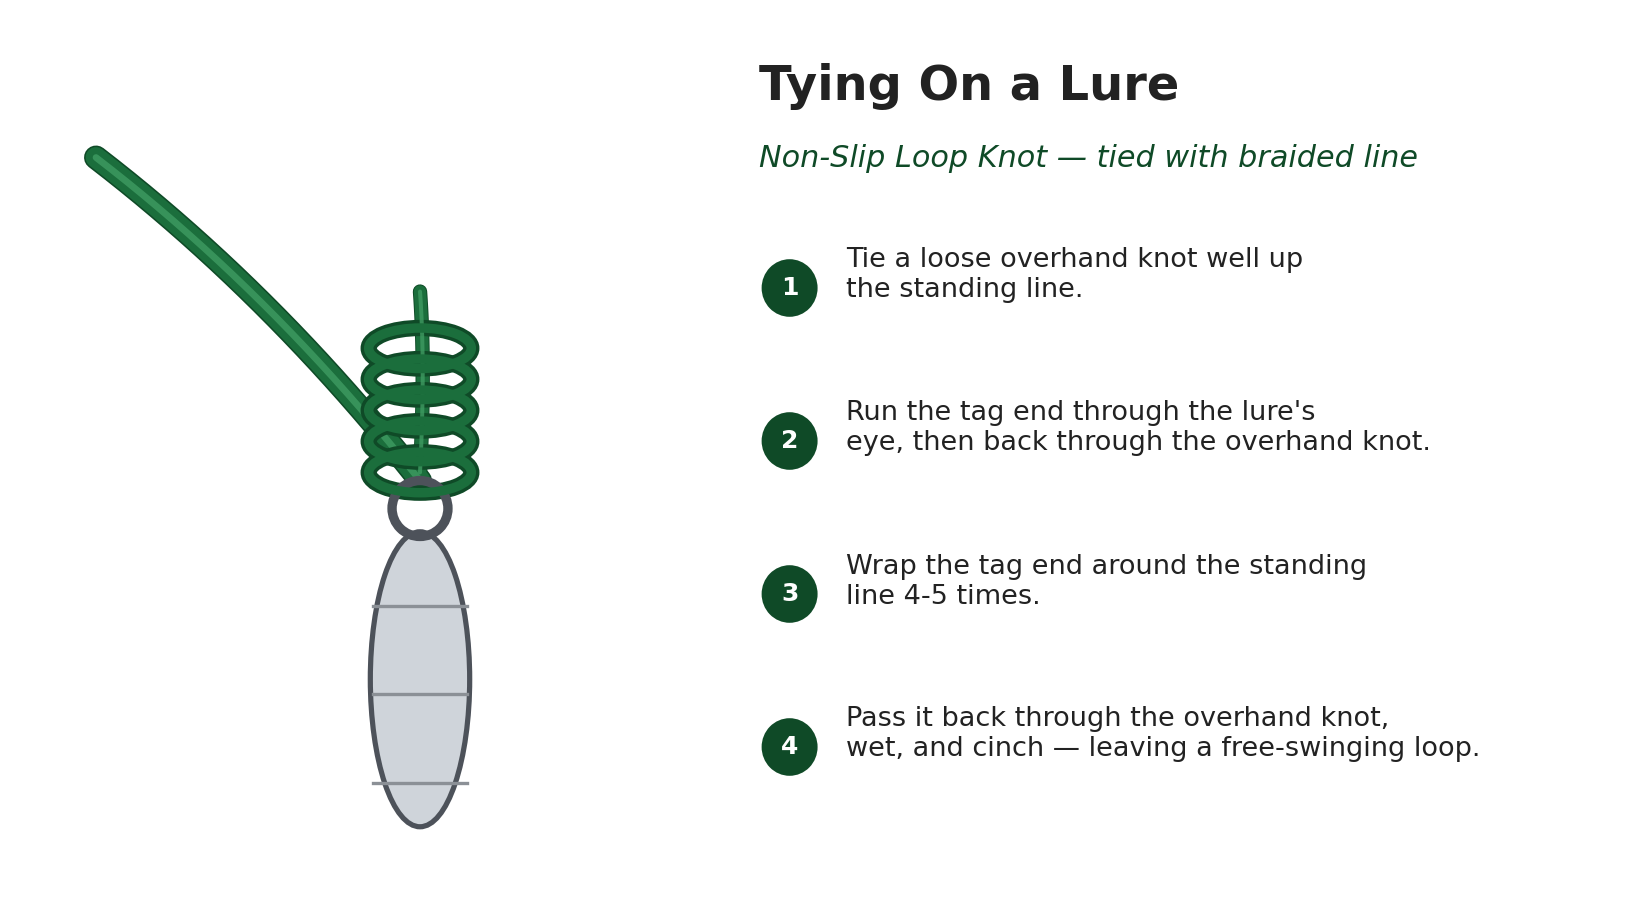
Lures move differently depending on how they’re attached. A clinch knot pulled tight directly against a lure’s eye restricts its natural swimming action, which matters a lot for jigs, plugs, and swimbaits designed to wobble or flutter freely. A loop knot, like the non-slip mono loop, leaves room at the eye so the lure can move the way it was designed to.
- Tie a simple overhand knot in your leader about 6 inches from the tag end, without tightening it.
- Pass the tag end through the lure’s eye, then back through the overhand knot you just tied.
- Wrap the tag end around the standing line 3–4 times.
- Pass the tag end back through the original overhand knot from the same side it exited.
- Wet it, cinch it down slowly, and trim the tag end.
The result is a fixed loop that lets the lure swing freely at the eye, giving jigs and plugs the full range of motion they were built for.
Rigging a Jig Lure: Assist Hooks and Solid Rings
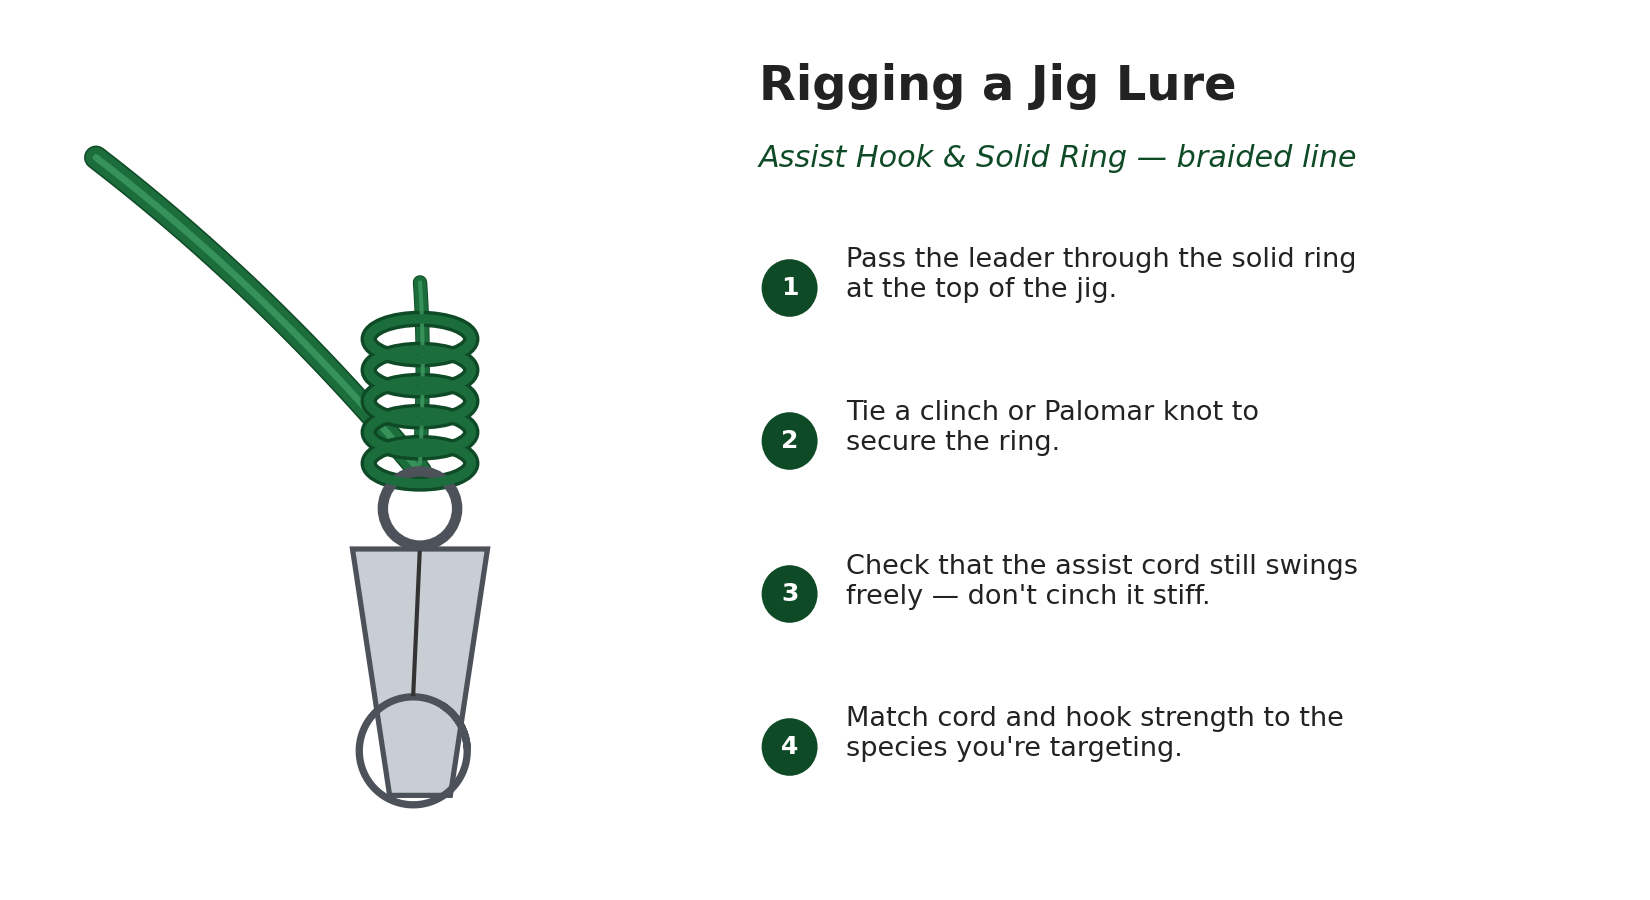
Metal jigs don’t attach the same way a swimbait or plug does. Instead of tying directly to a lure eye, most jigs use a solid ring at the head or tail (or both) that an assist hook is looped through — the assist cord rides free of the jig’s body, which keeps the hook riding correctly during the flutter and fall that triggers most strikes.
- Connect your leader to the solid ring using a Palomar knot or an improved clinch knot, exactly as you would for a hook eye.
- Check that the assist hook’s cord loop moves freely on the solid ring — if it’s cinched down tight against the ring, the hook won’t swing naturally and you’ll miss strikes.
- For slow pitch jigs, a single assist hook at the head is usually enough since the jig’s fall is the main trigger. For speed jigging or GT-style aggressive jigs, many anglers run assist hooks on both ends to cover short strikes from fish attacking the tail.
- Match assist cord and hook strength to the species — light cord is fine for reef species, but GT and tuna need heavy-duty assist cord that won’t fray against a hard, fast strike.
Split rings show up on jigs too, usually connecting trebles on casting-style metal jigs rather than assist-hook jigs. Open a split ring with split ring pliers rather than your fingernails — it’s faster, safer, and won’t leave you fumbling mid-fight when you’re switching hooks between trips.
A Few Things That Matter More Than the Knot Itself
Always wet your knot before you cinch it down — a dry knot generates friction and heat that weakens the line right where it matters most. Pull knots tight slowly and steadily rather than yanking them, and check your knot after landing a fish before casting again, since repeated strikes can work a knot loose even if it didn’t fail outright.
Practicing these knots at home, with slack line and no pressure, makes a real difference the first time you’re re-rigging on the water with a fish busting bait fifty feet away. Pair a properly tied connection with quality hooks, swivels, and terminal tackle, and the weak link in your setup stops being the one thing you actually control.
Final Word
Hooks, swivels, and lures each call for a slightly different approach, but the principle is the same across all three: a clean, well-practiced knot that doesn’t restrict movement or weaken the line. Get these fundamentals right and you’ll stop losing fish to gear failure — and start losing them only to the fish outsmarting you, which is a much better problem to have.